-
Some ideas for a wooden Christmas tree
Here you can see a few different kinds of wooden Christmas trees: a tabletop model with triangular sides, a flat model made out of lengths of wood and suitable for wall‑mounting, and a model made of round lengths of wood crossing over each other. Another 3-dimensional model uses straight lengths of wood in a crossover pattern – you can make this version as high as you want by using more or less horizontal wooden strips.
-
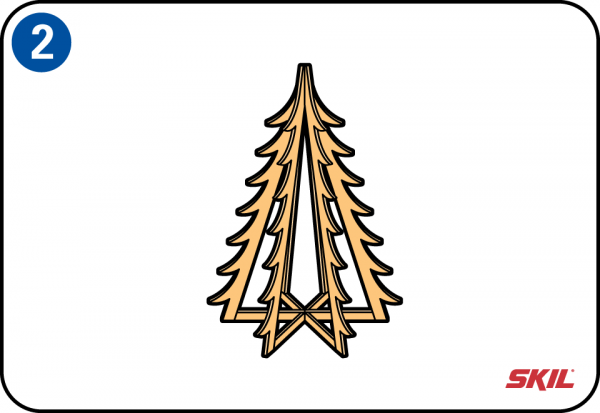
Make a floor-standing Christmas tree
If you want to make a floor-standing Christmas tree, it’s a good idea to keep the dimensions fairly slim. You can do that by using narrower strips of wood. That will keep the width down, so it’s easier to make a taller tree. The wooden triangles are fixed at an angle of 15°. You can attach all kinds of decorations to your tree – like miniature LED lights, globes and stars, either on the inside or the outside of the tree.
-
Choose the format of the Christmas tree
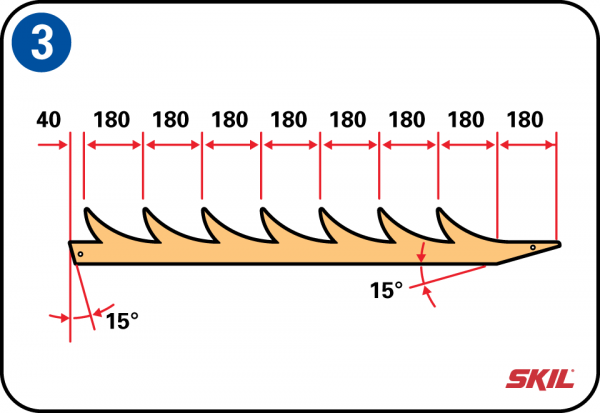
It’s best to use water-resistant plywood, whether you’re making a small tabletop Christmas tree or a larger floor-standing tree. For a smaller tree, use 9 mm thick plywood, and use 12 or 18 mm thick plywood for a larger tree. The drawing shows you the dimensions for a Christmas tree with a height of around 145 cm. Of course you’re free to choose any shape you like for the branches of the tree.
-
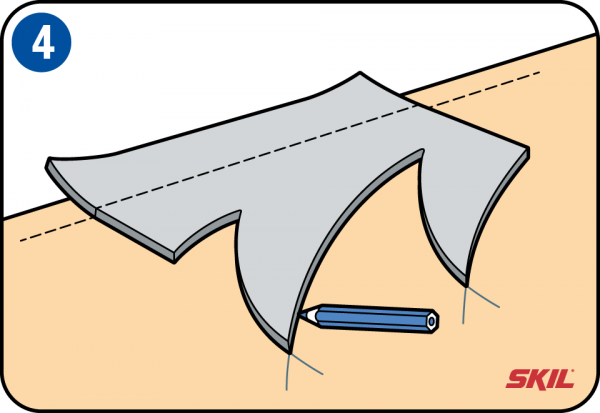
Make the ‘branches’
Choose the number of wood profiles – or ‘branches’ – you need for your Christmas tree; this will usually be 4, 6 or 8. To help you keep all the branches the same, start by cutting out a cardboard template. Then use a pencil to draw along the edges of the template and mark out the shapes of the branches so they are all the same. The top part of each branch is at an angle of 15°, so the tips of all the branches of the finished tree will be arranged in an attractive pattern.
-
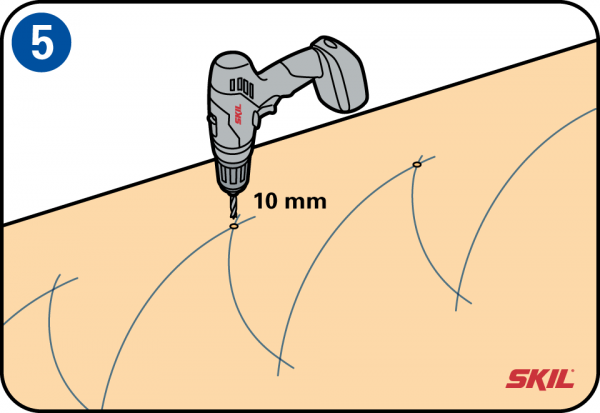
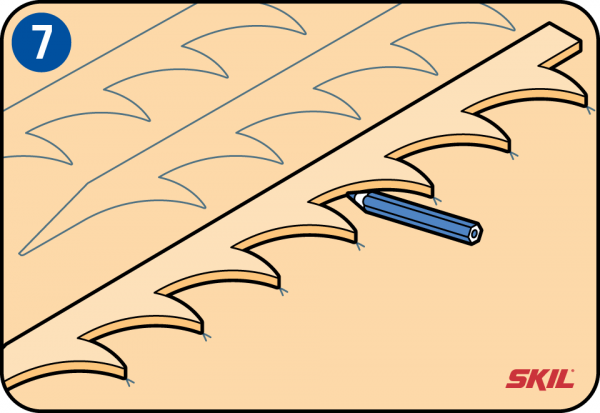
Avoid splitting of the wood
Drill holes at the internal angles of the branches using an 8 mm wood drill. This will help to stop the cut edges of the wood from splitting, and will also make it easier for you to use the jigsaw.
-
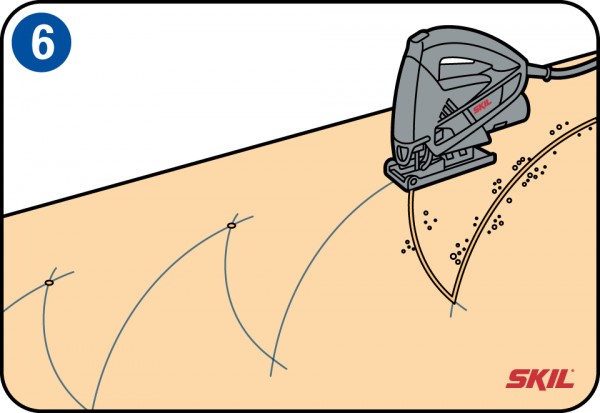
Saw out the branches
Use the jigsaw to saw out the first complete profile or branch of the tree. Saw smoothly and slowly, let your power tool do the work, make sure you use a sharp saw blade, and follow the pencil lines carefully.
-
Use the first branch as a template
Smooth the sawn edges with sandpaper, and use this first profile or branch of the tree as a template for all the other branches. Draw along the edges with a pencil until you have marked out the complete outline of the next branch. Use your plywood panel as efficiently as possible by carefully fitting the profiles onto it.
-
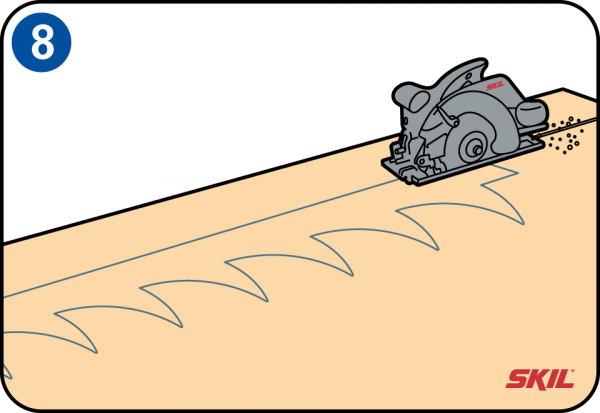
Saw out the branches
Use the jigsaw to saw out the shapes of all the branches, and use a circular saw to saw the straight edges to size. Remove splinters and sand the edges smooth with sandpaper (grain size 180).
-
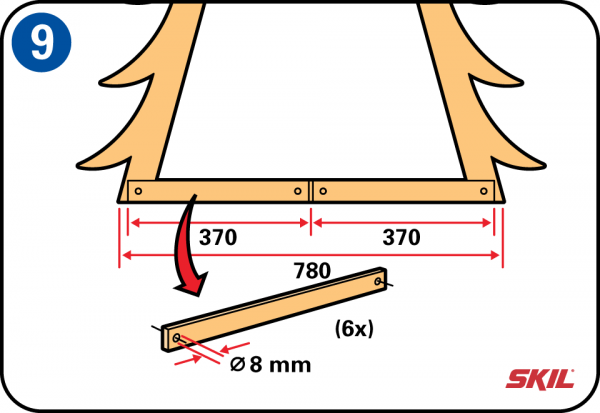
Make the connecting pieces of the Christmas tree
The base of the triangular tree, in other words the width of the tree at floor level, is approximately 780 mm. The bottom parts of the 6 profiles or branches are held together by connecting pieces. These measure around 40 x 370 mm, and you can saw them out of the remaining pieces of the plywood panel. Drill 8 mm holes at the ends of the connecting pieces – these are for the lengths of sisal rope that will hold the branches of the tree together.
-
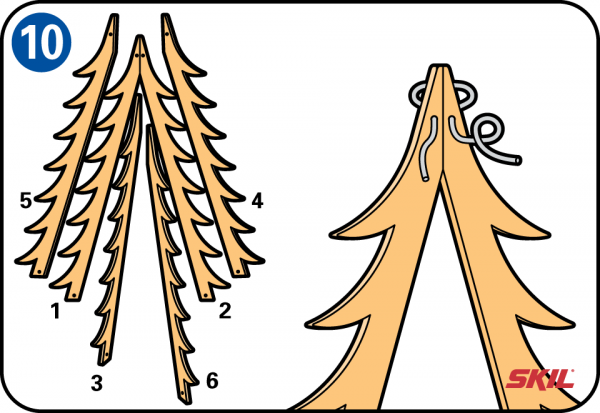
Assemble the Christmas tree
If you have 6 profiles or branches, first put the 2 branches that are directly opposite to each other in place, followed by the 4 others. To keep all the branches together, drill an 8 mm hole at the top of each branch and tie them neatly together with the sisal rope.
-
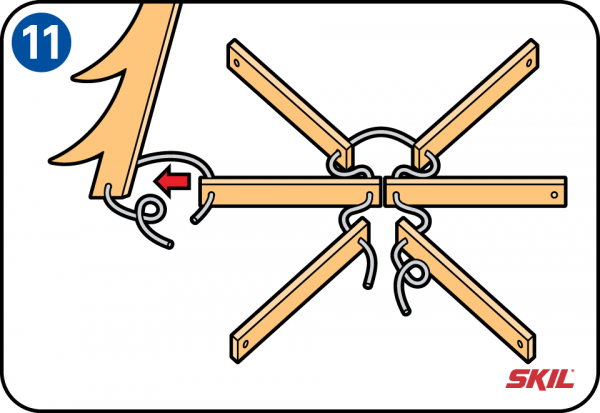
Assemble the connecting pieces
The 6 profiles of branches are held together by 6 connecting pieces that meet at the centre. These connecting pieces are tied together by sisal rope so the 6 branches are evenly spaced. It’s best to use sisal rope because this has an attractive ‘look and feel’ and perfectly matches the natural plywood that you’ve used to make your Christmas tree.